UPDATED 07/09/2020
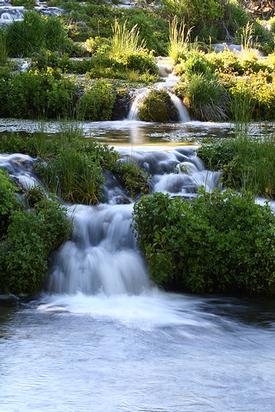
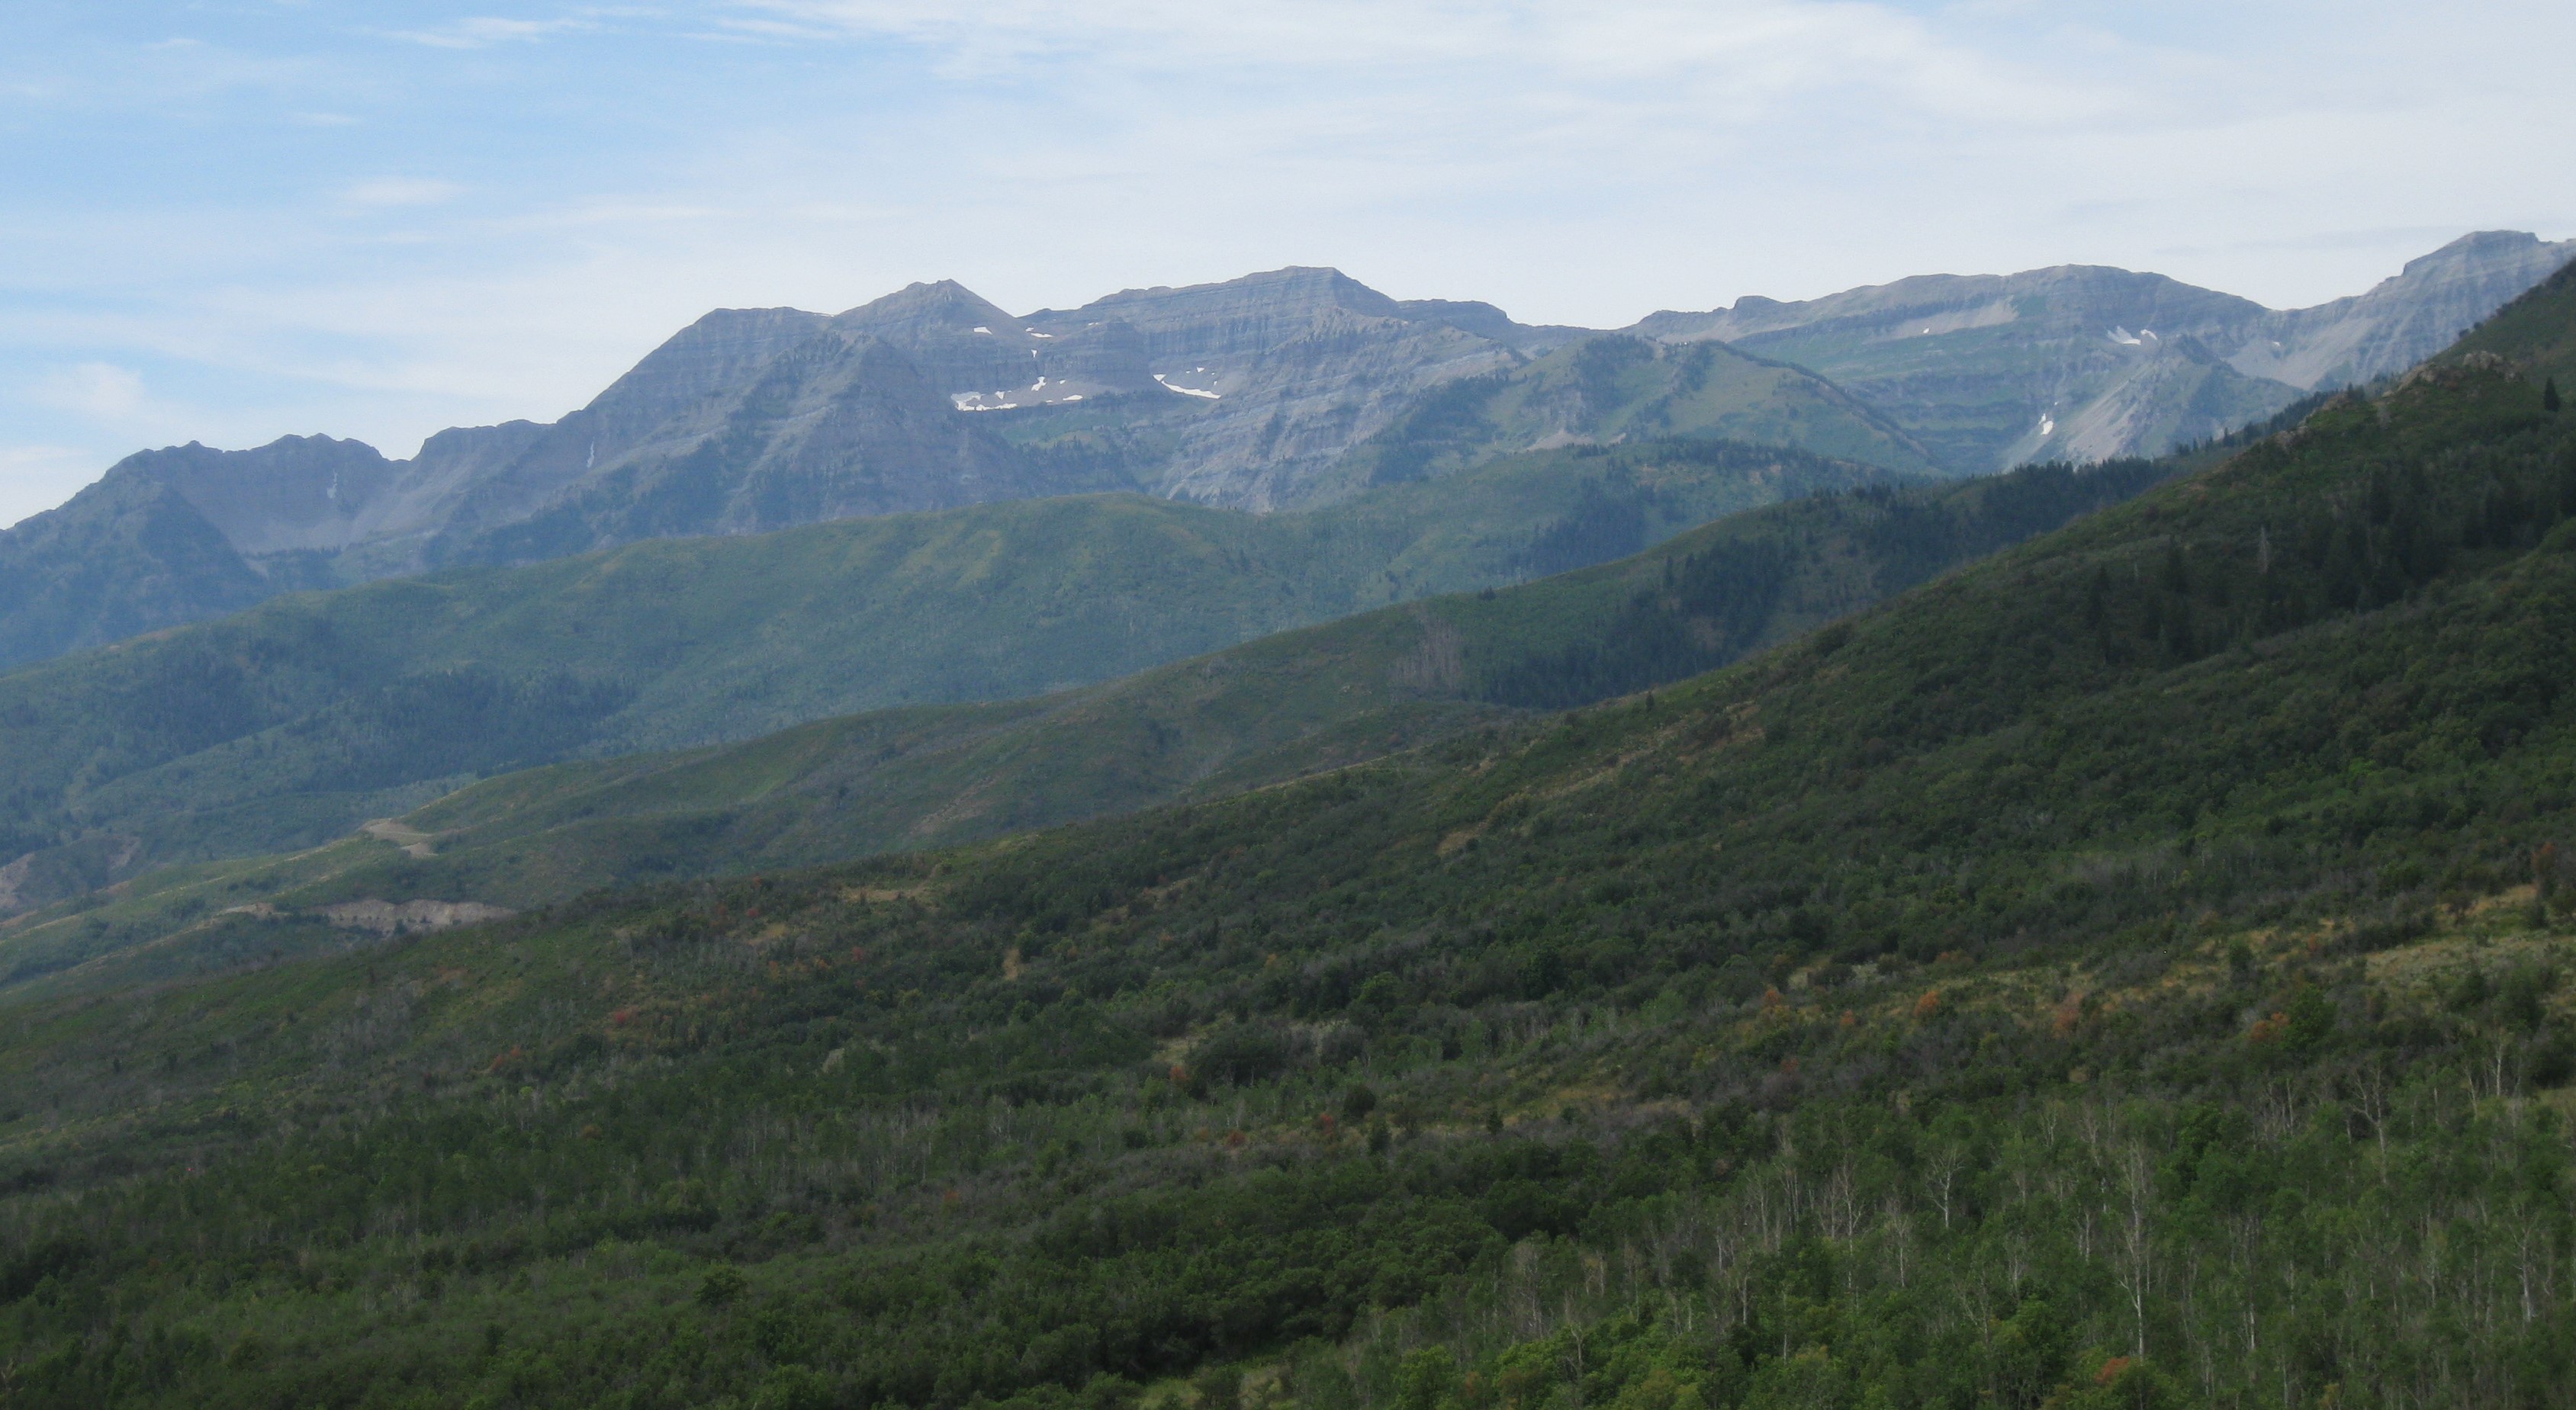
The Mill Canyon Ride is a fun half to full-day riding experience, depending on how much time you want to spend. The backbone of the trail traverses the main ridge between American Fork Canyon and the Heber Valley with great views of Heber Valley, Deer Creek Reservoir, the Soldier Hollow Olympic Venue, and Golf Course and Mount Timpanogos. Cascade Springs is also located on this ride and is a great place to stop and enjoy the unique beauty of the springs.
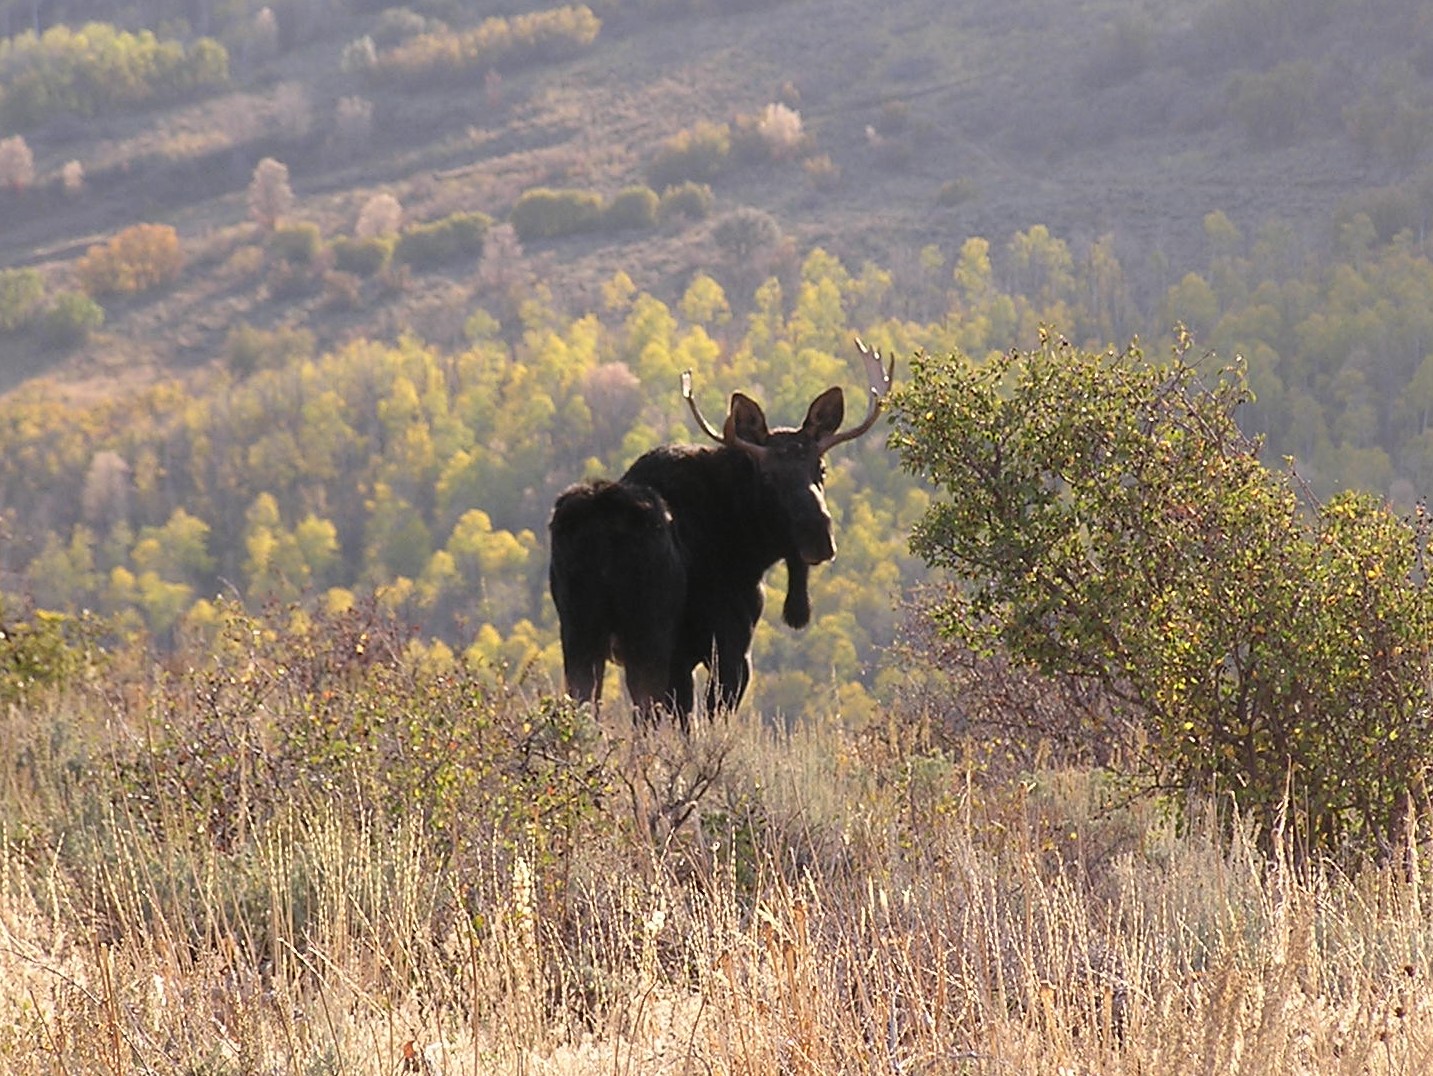
Wildlife in the area includes elk, moose, deer, coyotes, eagles, hawks, squirrels, chipmunks, etc.
There are a few water crossings along this route that always make riding your ATV more fun. All roads and trails are signed according to the maps, so it’s easy to keep track of where you are. The elevation range is approx. 5600 to 9300 feet. The best time to ride this system is from late spring to early fall. There are several places along this route to stop and have a relaxing lunch and enjoy the quiet serenity.
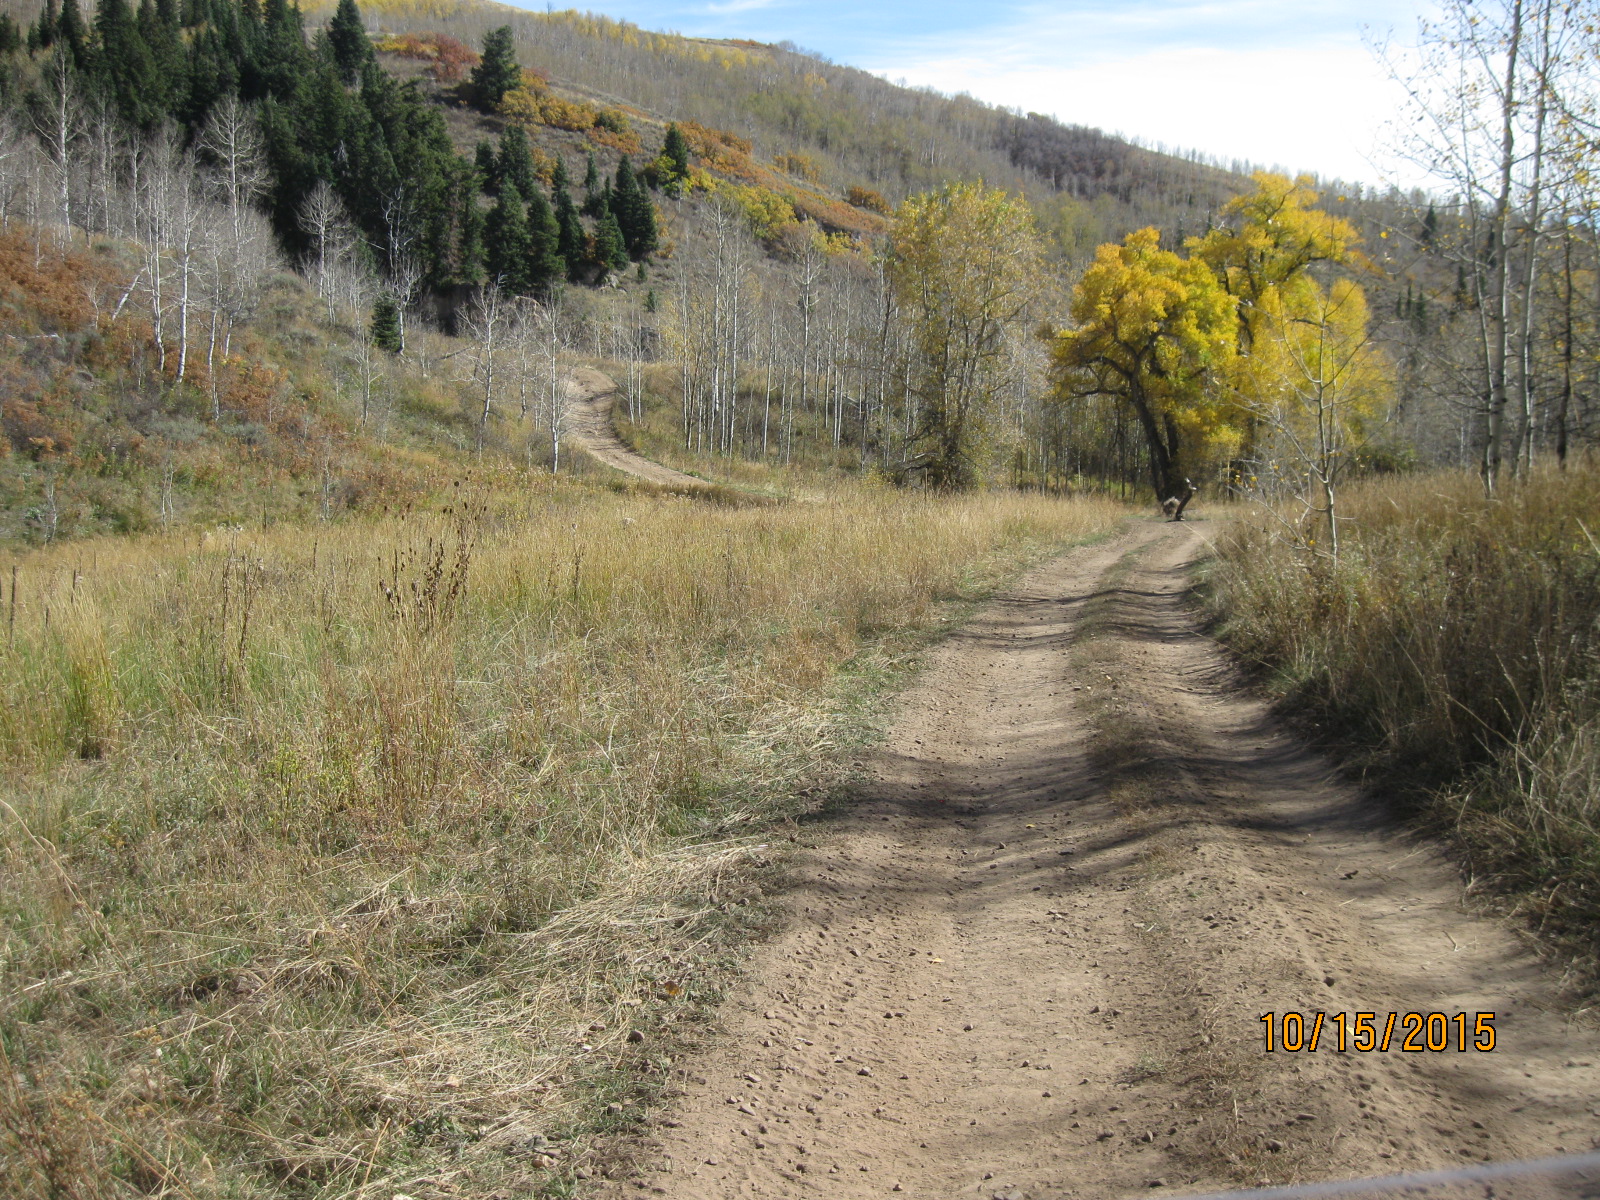
FR 420, called Big Flats, is a great trail to explore. 30% of this trail is a Terrain Rating #3 with some #4 ruts to navigate but is very manageable. Just take your time. The effort to negotiate this trail will reward you with some fabulous views of Heber Valley. At the top, there is a motorcycle trail that you can walk up to the top of the ridge to hiking trail 157. There are some great views down into American Fork Canyon along this trail. (See WPs #15 & #16 for instructions.)
After exploring FR 420, you need to get back on FR 085 and travel the short distance to FR 421 (WP #17), which will take you back into mining history. This road is a bit more rugged, with a terrain rating of 3.5 to 4.5. At the top, there are some rocks to go over (terrain 5), but they are passable and worth the trip if you’re into old mines.
Your final destination will be the parking lot at Mill Flats, where you can rest a bit before you head back to your vehicle. There is a Rest Room here.
Going back, just stay on FR O85 to wp #12. Then turn left onto Cummings Parkway and follow it all the way to WP #3. Turn left and head down the mountain.
One note about this ride. The State Park and the Forest Service have not done a very good job of marking and maintaining trail signs. We have indicated trail and road designations on our maps, but you won’t find too many actual markers. The pictures at waypoints (WP) will be helpful.
We know you will really enjoy this ride and as always, feel free to explore any side trails.
GET OUT FOR A RIDE!
We always recommend that someone at home knows where you have gone to ride. You should include some of the information in this ride package, such as the trailhead destination and coordinate, a copy of the trail map, and an approximate time you will be back. Some rides will have occasional cell phone service, but you cannot always count on that. We want you to be safe and have fun. Please don’t venture off without telling someone where you are going.
(All Directions begin at 10600 South Exit on I-15 in Sandy, Utah. Routes and travel times to trailheads will vary depending on your location.)
Google Map Coordinates of Trail Head: 40.490950 -111.491817
Distance to Trailhead: 47 Miles
Take I-15 to exit 272 800 North in Orem and go east on SR 50, traveling through Orem to US 189 (approx. 6 miles). When you are approaching US 189, stay in the left lane and take US 189 toward Heber City up Provo Canyon. You will stay on US 189 until you reach the end of Deer Creek Reservoir (approx. 17 miles). At the end of the reservoir, turn left (north) on SR 113 for approx. 2 miles to the railroad tracks and Tate Lane. Tate Lane is right after you cross the railroad tracks. Turn left (west) on Tate Lane and proceed a short distance to Stringtown Road. Turn right (north) on Stringtown Road, another short distance to Cascade Springs Road and the Wasatch State Park. Turn left (west) on Cascade Springs Road. The trailhead and the parking lot is about 1 mile on the right.
Photo of Staging Area:
(Click Photo to Enlarge)
(View on Waypoint Maps below.)
POI #1 Cascade Springs: 40.457972, -111.548964 (Click for Photo)
POI #2 Provo Deer Creek Water Crossing: 40.505648, -111.536322 (Click for Video)
POI #3 View/Photo of Heber Valley: 40.532260°, -111.543537° (Click for Photo)
POI #4 Old Mining Area: 40.573445, -111.578159 (Click for Photo)
Old Diesel Engine Block Below Tailings: (Click for Photo)
POI #5 Stop Here to walk to the water source: 40.572691°, -111.580114°
(CLICK HERE) to download GPS Points of Interest to a device or to print on paper. Instructions on how to do this are under “How to Download Maps to a Device or to Print on Paper” below.
There are two agencies involved in this ride – Wasatch State Park and Uinta-Wasatch-Cache National Forest. Motor Vehicle Maps for both are provided on this website. Please pay close attention to where and where you cannot ride, especially in the State Park. They patrol regularly.
There are two fees involved with this Trail System.
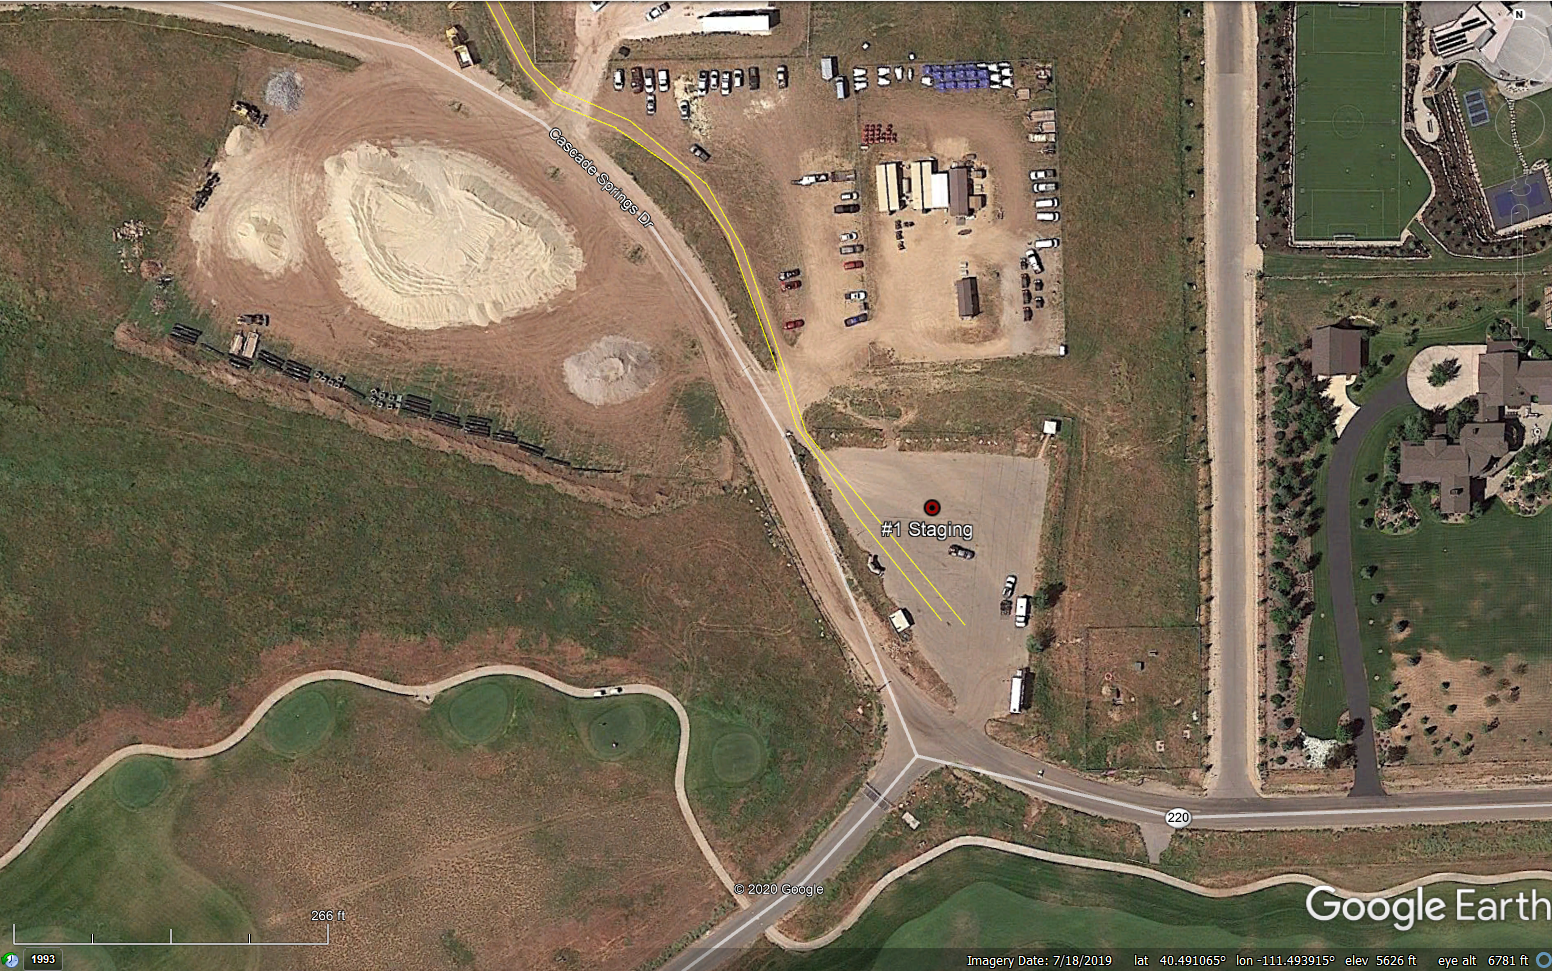
Wasatch State Park has a Day Use Fee. This fee is only for passenger vehicles, not the OHVs. However, you will need this permit to park at the trailhead. There is a pay station at the trailhead. Currently, it is $7.00 per day up to 8 people. $4.00 per day if you are 62 or older. You can also purchase an annual pass for $75.00 at a State Park Office.
Uinta- Wasatch-Cache National Forest has a Recreation Fee. The Forest Service has told us that if you are going to Cascade Springs, you will need to purchase a Uinta-Wasatch-Cache Rec Pass. Currently, a 3-Day Pass is $6.00, a 7-Day Pass is $12.00, and an annual pass is $45.00. There is not a pay station at this trailhead. The pay station is at Cascade Springs for the 3 and 7 Day permits. You can purchase the 3 and 7 Day permits online at https://yourpassnow.com/r1s/site/74405. Your pass will look like this: (Photo)
Now here is the strange part. You buy the pass for the vehicle you arrived in or the vehicle that you are using to tow your ATV or SSV, not your ATV or SSV. Yeah. for real.
However, we would recommend purchasing the annual pass as it is good for American Fork Canyon and the Mirror Lake Highway area, which both have several rides. Annual permits can be purchased at any of the following Ranger District Offices: (Due to current COVID19 conditions, Annual Permits are sold at these offices by appointment only.)
Heber- Kamas Ranger District
Kamas Office
50 East Center Street
Kamas, Utah 84036
(435) 783-4338
Pleasant Grove Ranger District
390 North 100 East
Pleasant Grove, Utah 84062
(801) 785-3563
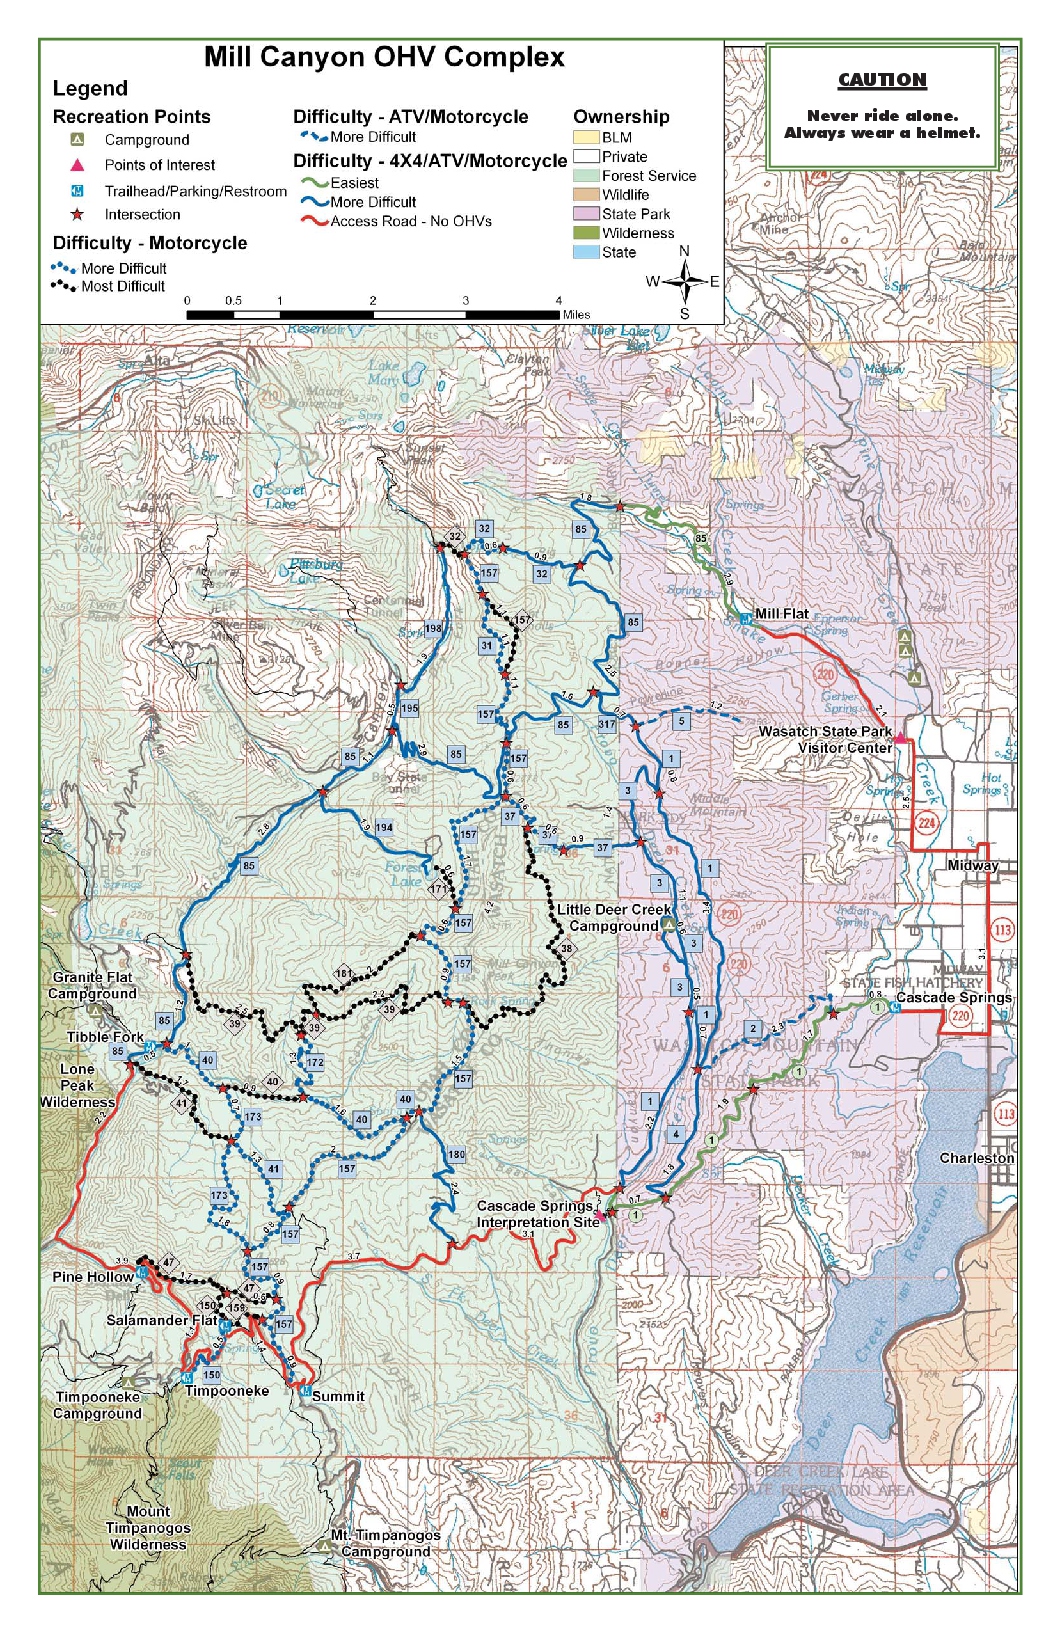
Digital Waypoint Maps correspond with the GPS Points of Interest above and the Waypoint Information listed below. These are Real-Time Photos of the trail and contain a Latitude/Longitude Grid. Study them before you go. This will help you understand the trail route before you arrive. We strongly suggest that a good GPS is an important device to have when you are ATVing. (You cannot always rely on a cell phone for these coordinates as you don’t always have service.) You can check the Lat/Long coordinates on your GPS and use them to find exactly where you are on the digital Waypoint Maps provided for this trail. These digital maps can be downloaded to a phone or tablet as a picture (you don’t need cell service to look up a picture) or printed from your computer on a piece of paper. Instructions on how to do this are detailed below under “How to Download Digital Maps and Photos to a Phone or Tablet or Print on Paper.” (Additional types of maps can be found below under “Maps.”)
(Click on Icon to See Map)
 Mill Canyon WP Map #2
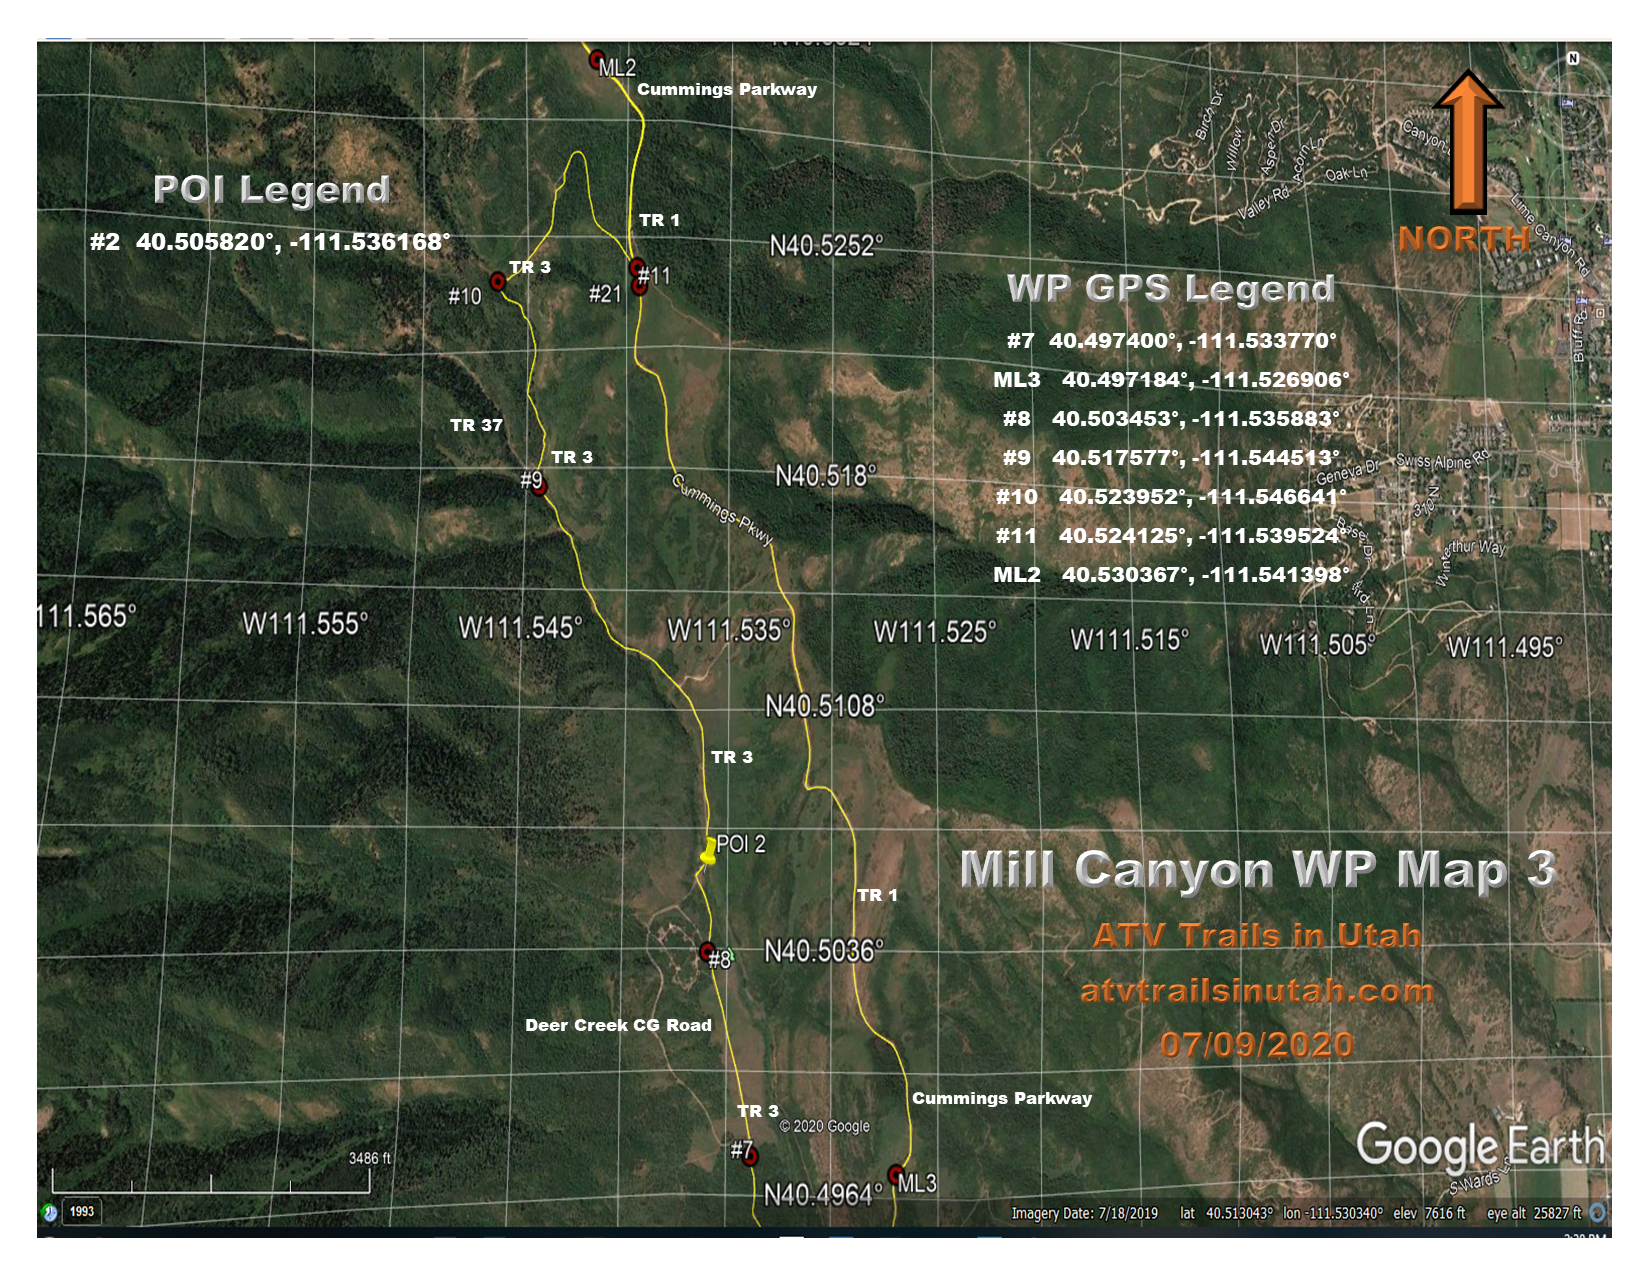 Mill Canyon WP Map #3
 Mill Canyon WP Map #4
 Mill Canyon WP Map #5
Waypoint (WP) information corresponds with the maps listed above and the Google Earth file listed below. (To see the entire trail, download this file to Google Earth on your computer.) You can download the photos to your phone or tablet as a picture along with your Digital Waypoint Maps. Or you can print them on paper. Instructions on how to do this are detailed below under “How to Download Digital Maps and Photos to a Phone or tablet or Print on Paper.”
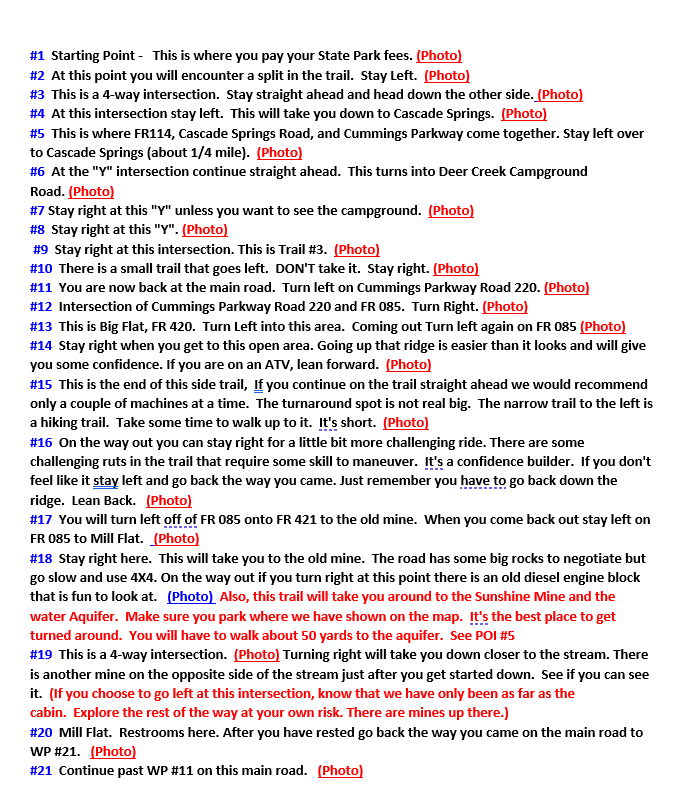
#1 Starting Point – This is where you pay your State Park fees. (Photo)
#2 At this point, you will encounter a split in the trail. Stay Left. (Photo)
#3 This is a 4-way intersection. Stay straight ahead and head down the other side. (Photo)
#4 At this intersection, stay left. This will take you down to Cascade Springs. (Photo)
#5 This is where FR114, Cascade Springs Road, and Cummings Parkway come together. Stay left over to Cascade Springs (about 1/4 mile). (Photo)
#6 At the “Y” intersection, continue straight ahead. This turns into Deer Creek Campground Road. (Photo)
#7 Stay right at this “Y” unless you want to see the campground. (Photo)
#8 Stay right at this “Y.” (Photo)
#9 Stay right at this intersection. This is Trail #3. (Photo)
#10 There is a small trail that goes left. DON’T take it. Stay right. (Photo)
#11 You are now back at the main road. Turn left on Cummings Parkway Road 220. (Photo)
#12 Intersection of Cummings Parkway Road 220 and FR 085. Turn Right. (Photo)
#13 This is Big Flat, FR 420. Turn Left into this area. Coming out, Turn left again on FR 085 (Photo)
#14 Stay right when you get to this open area. Going up that ridge is easier than it looks and will give you some confidence. If you are on an ATV, lean forward. (Photo)
#15 This is the end of this side trail, If you continue on the trail straight ahead, we would recommend only a couple of machines at a time. The turnaround spot is not real big. The narrow trail to the left is a hiking trail. Take some time to walk up to it. It’s short. (Photo)
#16 On the way out, you can stay right for a little bit more challenging ride. There are some challenging ruts in the trail that require some skill to maneuver. It’s a confidence builder. If you don’t feel like it, stay left and go back the way you came. Just remember you have to go back down the ridge. Lean Back. (Photo)
#17 You will turn left off of FR 085 onto FR 421 to the old mine. When you come back out, stay left on FR 085 to Mill Flat. (Photo)
#18 Stay right here. This will take you to the old mine. The road has some big rocks to negotiate but go slow and use 4X4. On the way out, if you turn right at this point, there is an old diesel engine block that is fun to look at. (Photo) Also, this trail will take you around to the Sunshine Mine and the water Aquifer. Make sure you park where we have shown on the map. It’s the best place to get turned around. You will have to walk about 50 yards to the aquifer. See POI #5
#19 This is a 4-way intersection. (Photo) Turning right will take you down closer to the stream. There is another mine on the opposite side of the stream just after you get started down. See if you can see it. (If you choose to go left at this intersection, know that we have only been as far as the cabin. Explore the rest of the way at your own risk. There are mines up there.)
#20 Mill Flat. Restrooms here. After you have rested, go back the way you came on the main road to WP #21. (Photo)
#21 Continue past WP #11 on this main road. (Photo)
We have provided several maps for your use. Study them carefully before you go on the ride for the first time. It is very important that you have some understanding of the ride in order to enjoy the ride rather than being lost. We have provided three types of maps:
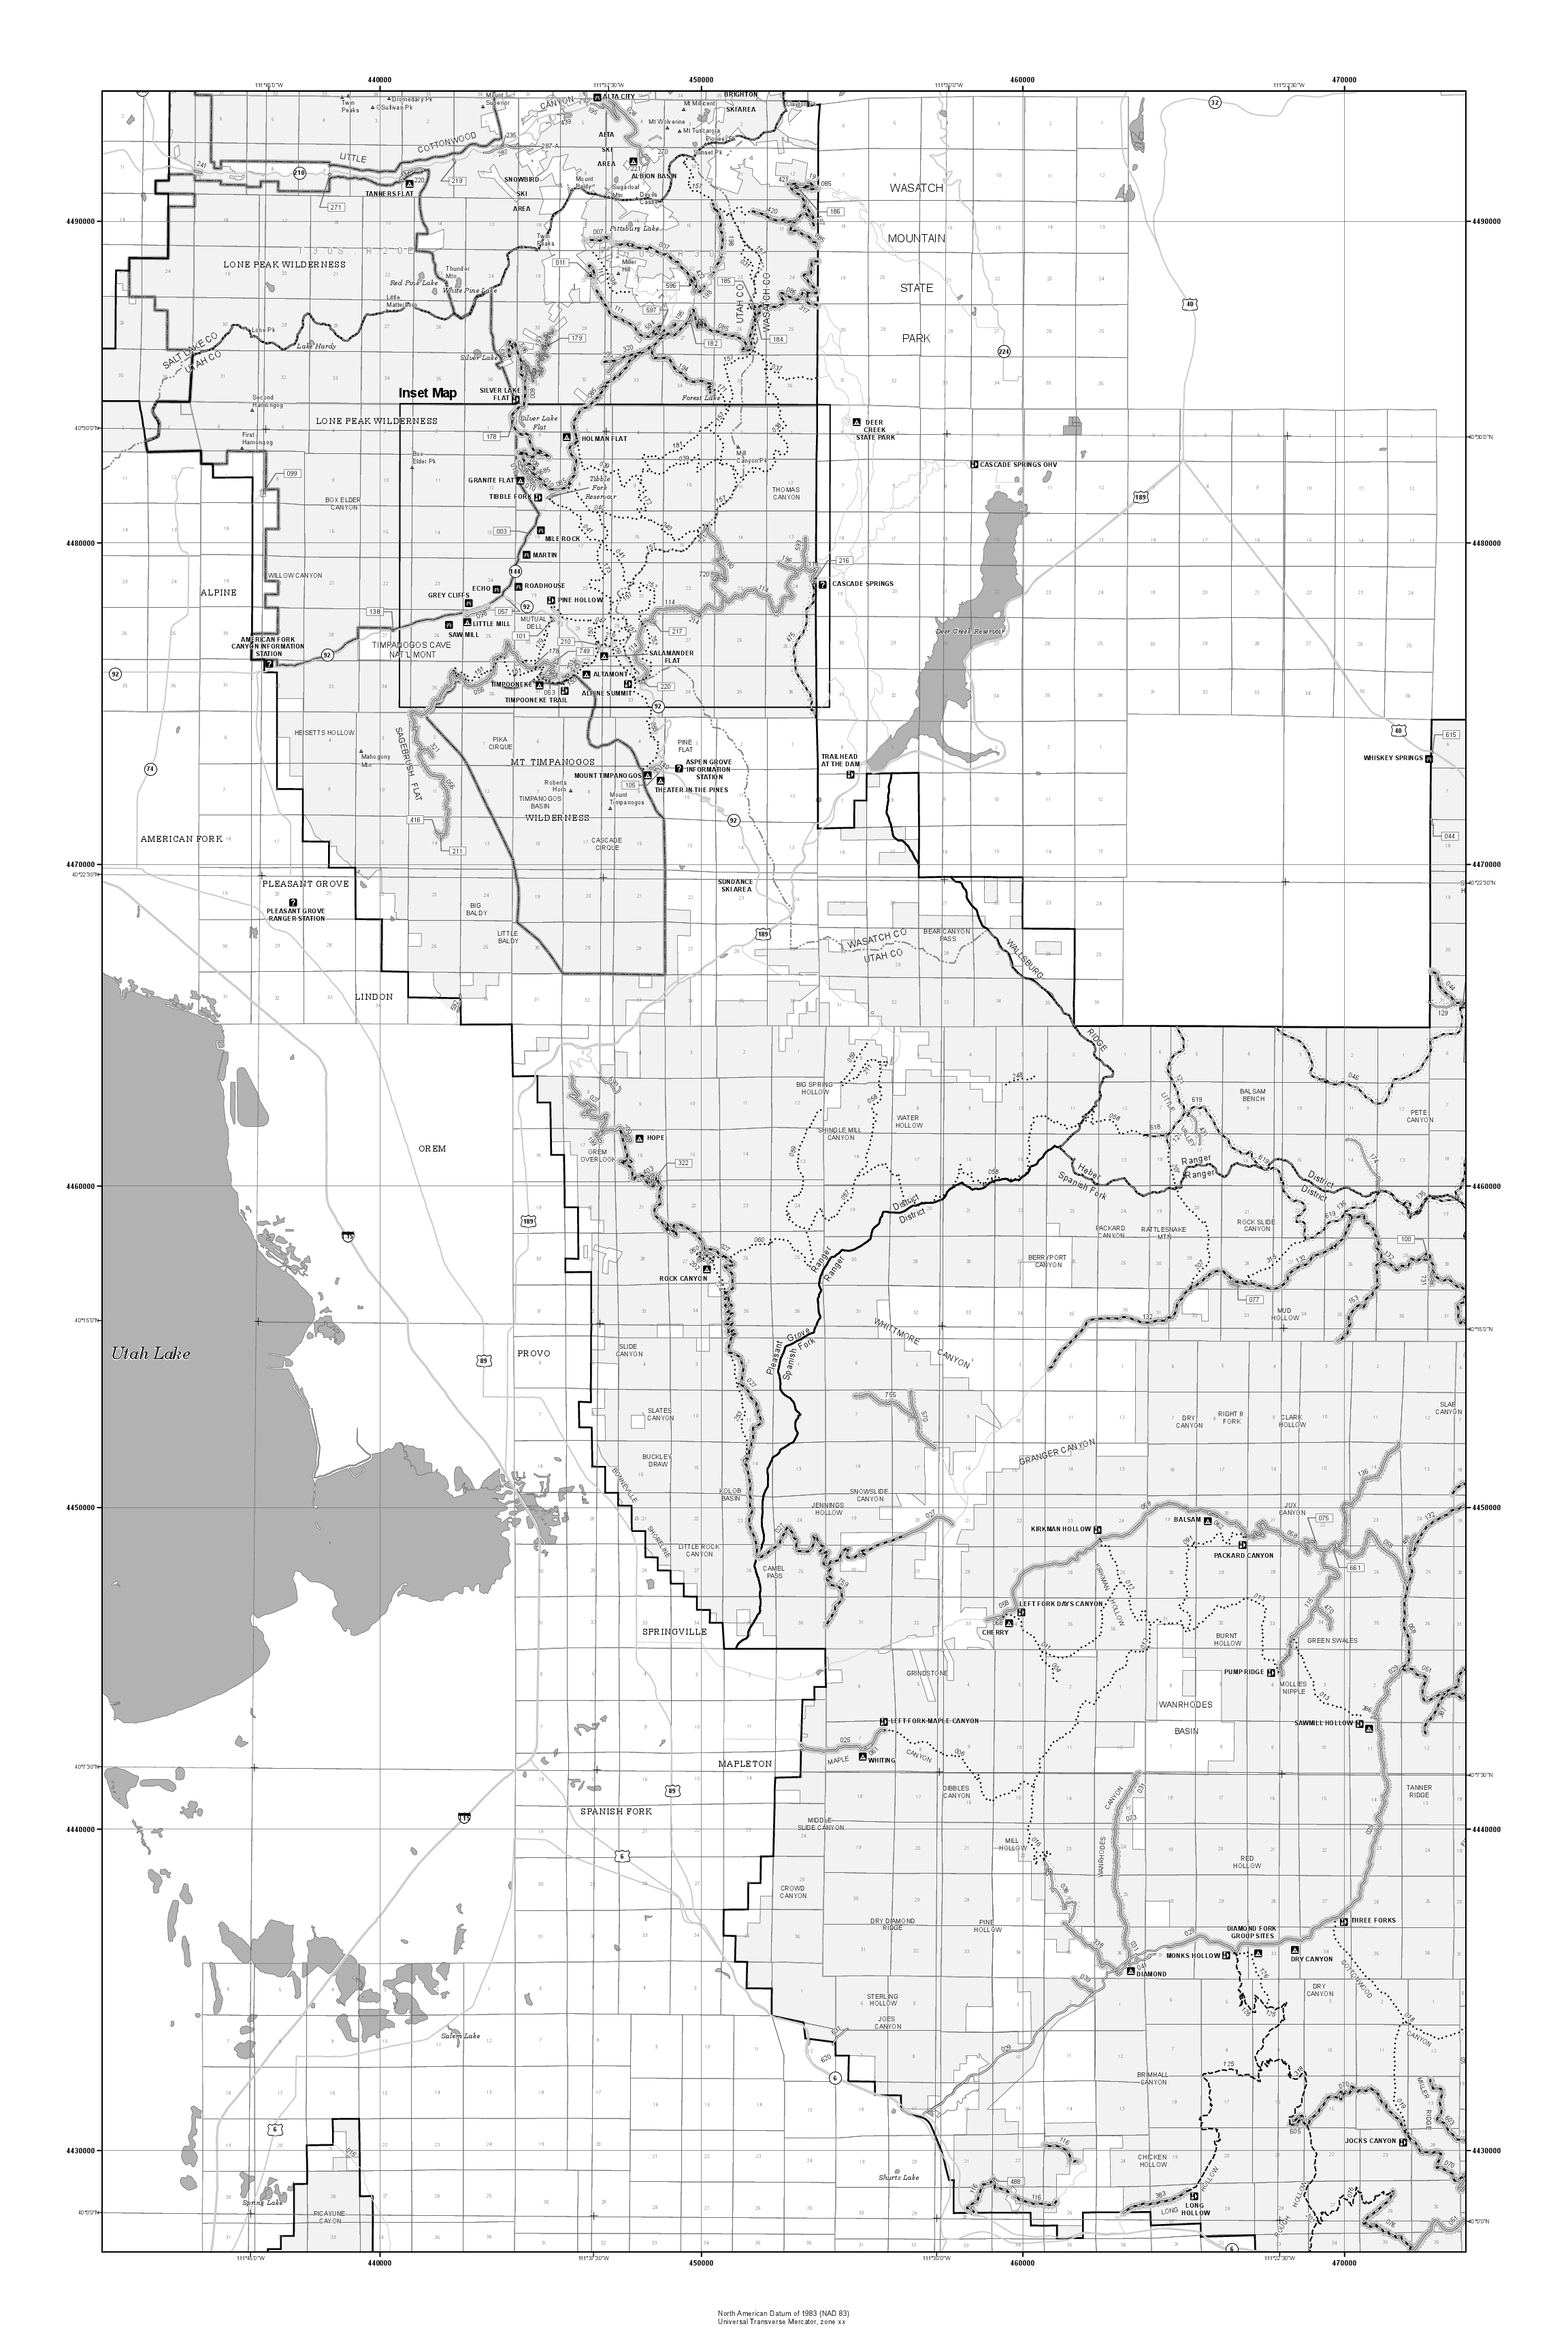
– USDAFS Motor Vehicle Use Map
– Topo maps of the area
All of these maps are images and are downloadable to your smartphone or to your computer. The Highlighted Trail map can be printed on an 8 ½ x 11 piece of paper to take with you. The Travel Maps and Topo Maps are large format and will not print that well on 8 ½ x 11 paper.
To download to your smartphone or device, open the website on your device. Next, open the trail package and then open the map on your device. Tap the screen and pick “Save Image” from the menu that comes up. The image is saved to your photos.
To print from your computer, right-click on the image. Click “Save Image as.” Select a file you want to save it in. Next, go to the file you saved the image in and double click. Your image should come up in a photo viewer of some kind. Follow the directions to print.
(Click on Icon to See Map)
 Pleasant Grove Ranger District #1 3.0 MB
 Pleasant Grove Ranger District #2 1.9 MB
 Mill Canyon #1 839 KB
 Mill Canyon #2 1.4 MB
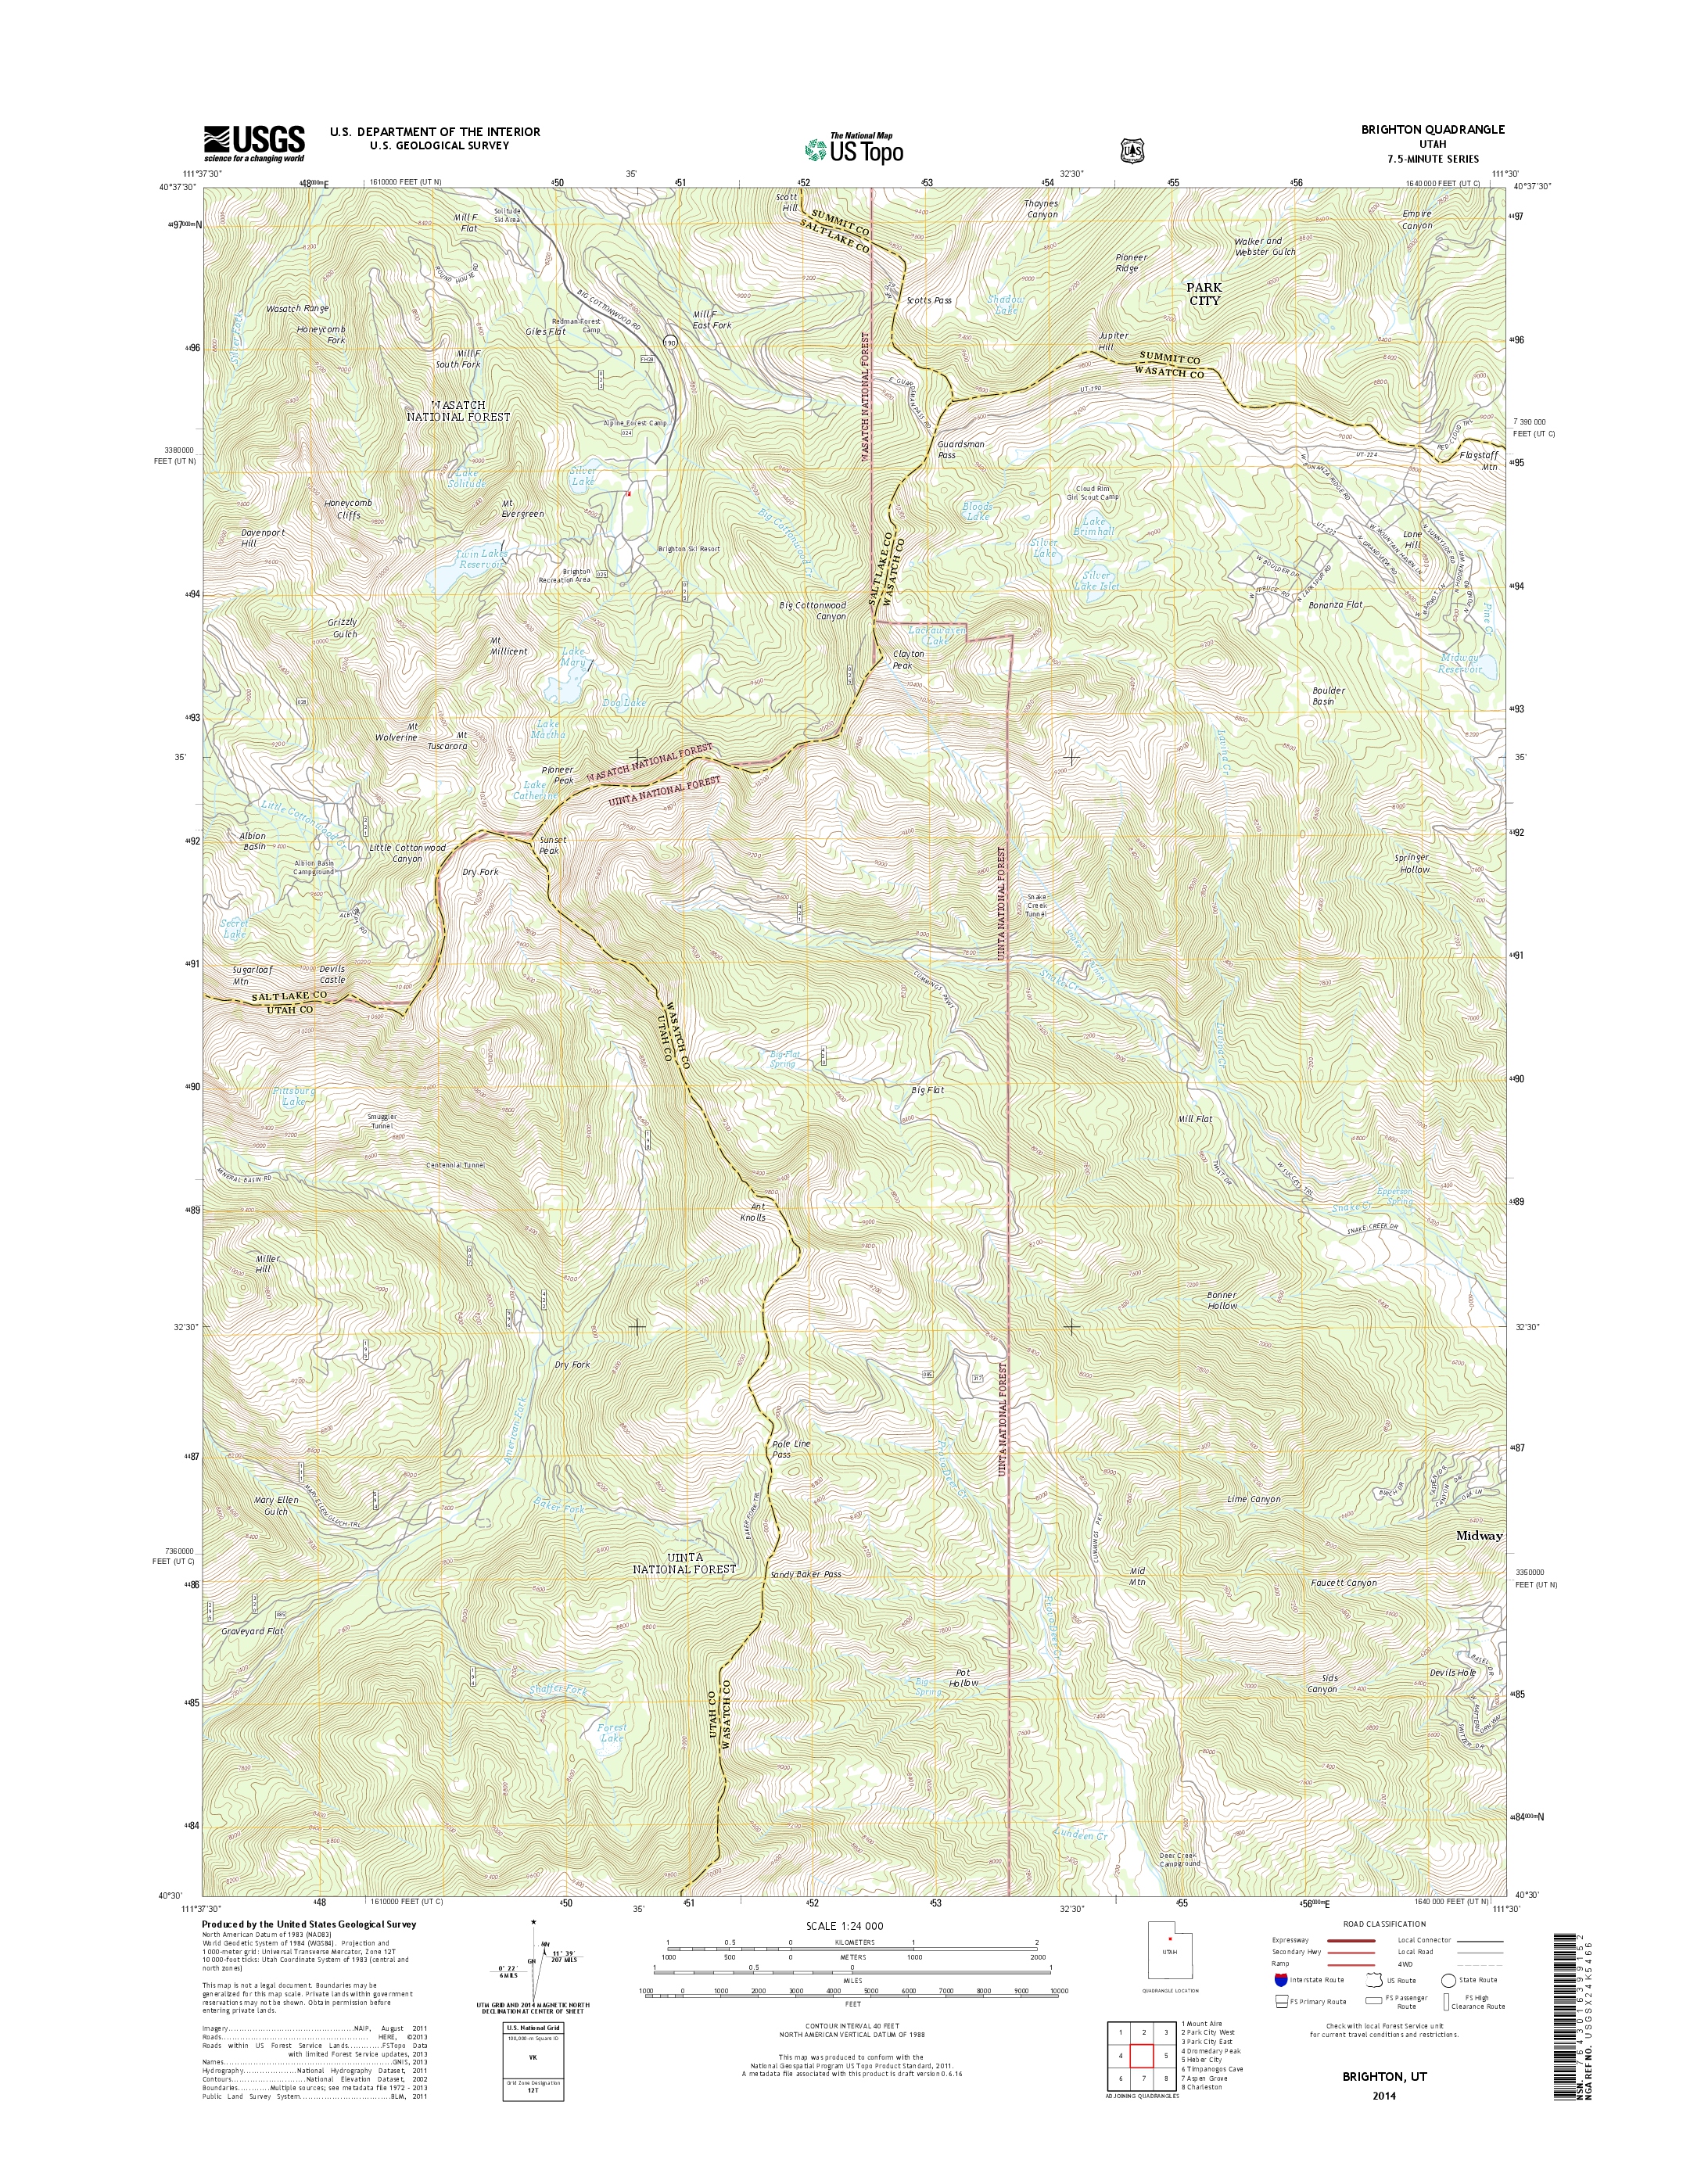 Brighton 3.7 MB
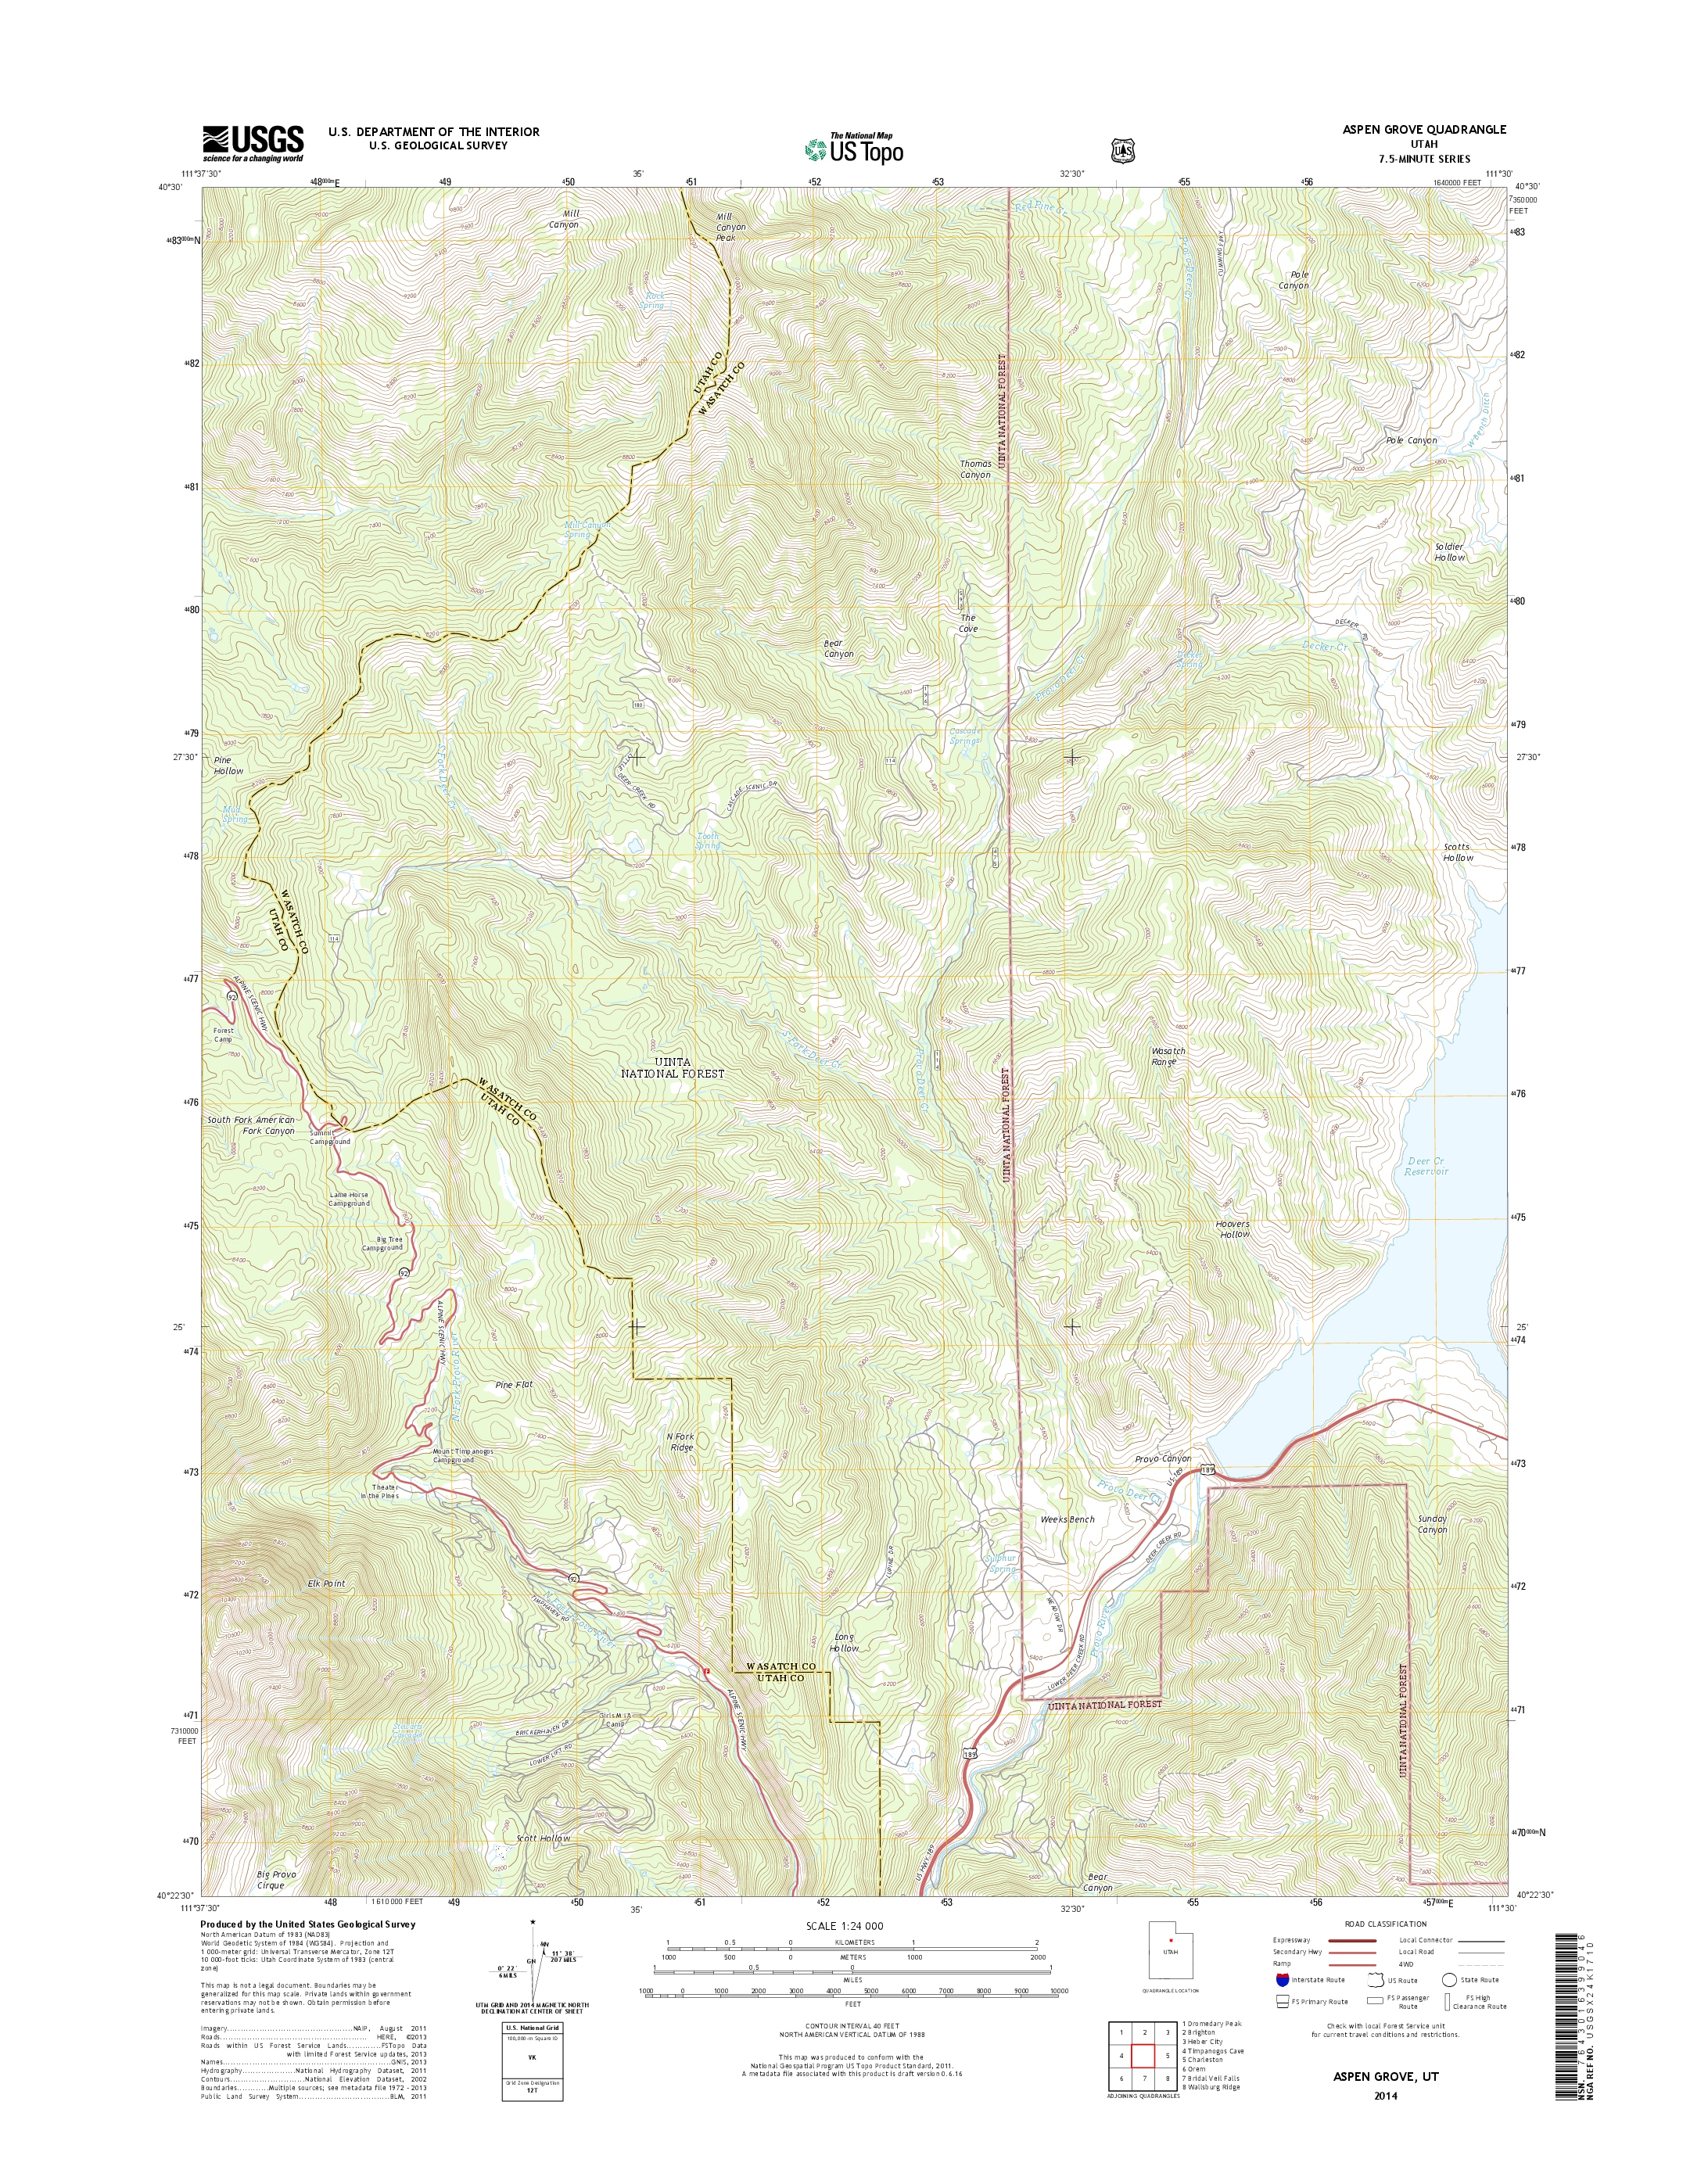 Aspen Grove 3.6 MB
 If you have a GPS, it can be very helpful to download a GPS Tracks file to it to help guide you on this trail ride. This is in addition to the maps we have already provided. Below, we have provided some popular GPS files for this ATV trail that you can download to your computer and then upload to your GPS. Instructions on how to do this are listed below. Please Note: (These instructions are for a Garmin Montana 610 series. You will be loading this file into Garmin BaseCamp. If you have a different GPS, you will need to consult that brand for instructions on how to upload your file. If you need a different file type other than what we have listed below, please contact us at info@atvtrailsinutah.com. We will provide you with a file format for your brand of GPS.)
MILL CANYON ATV TRAIL GPS TRACKS FILE
Mill Canyon GDB Format Garmin
Mill Canyon GPX Format
How to Download this GPS Tracks File to Your Computer.
How to Upload Your GPS Tracks File to BaseCamp.
(You will need to have the Garmin BaseCamp software loaded on your computer. If you don’t have BaseCamp loaded, then you will need to download the software and install it on your computer. It is free software. Download by clicking this link: Garmin BaseCamp )
Uploading the Trail File to the Garmin Montana 610.
Creating a Garmin Adventure: (Optional)
You can create a Garmin Adventure of the ATV Trail in BaseCamp. This allows you to travel the trail in BaseCamp. It’s a fun feature. You do this by:
To Play Back a Garmin Adventure Trail
In the left-hand column of BaseCamp is a box called “Garmin Adventures.”

Part of enjoying a new ATV ride is being prepared. We feel that preparation should include a thorough study of the maps of the area before you go. Another valuable tool is Google Earth. By studying Google Earth, you will become familiar with the trail layout and surrounding topography that you will recognize when you are actually on the trail. This has helped us many times as we have traveled these trails for the first time. We highly recommend this.
Provided below is a Google Earth file that can be downloaded to Google Earth on your desktop or laptop computer. You will have a satellite view of where you are going and where exactly the trail is. This is a lot of fun to study and can be very helpful to you when you are out on the trail. You will be amazed at how often you will recognize different parts of the trail and feel like “you’ve been here before,” even when it is your first time because you have studied it beforehand. Instructions on how to download this file to the Google Earth trail file are listed below.
If you do not have Google Earth on your computer or your mobile device, we have provided the following links so that you can download it.
(Click Here to Download Google Earth for Desktop & Mobile Device FREE)
MILL CANYON ATV Trail Google Earth Waypoint File
How to Download and Open This Google Earth Waypoint and Trail File:
You download the Google Earth file by clicking the link above.
You will be asked to save it somewhere on your computer.
Make sure you save it in a place where you can find it because you will need it to upload to Google Earth on your computer. Now do the following:
Depending on your service provider, there are areas on this ride where you have cell service. Because cell service is limited, smartphone GPS apps don’t always work. If you want reliable GPS service, we recommend you purchase an actual GPS that works off of satellites. They do come in very handy if you are going to be doing a lot of ATV exploring. GPSs are very reliable but don’t completely replace knowing how to use topo maps and a compass. On occasion, they can take you to the wrong place.
You understand and agree that ATV riding can be a dangerous activity. ATV Trails In Utah is not liable for any damage or injury, including death, resulting from your use of any information found on this website. ATV Trails In Utah also disclaims any liability for direct, indirect, incidental, and/or consequential damages that arise as a result of your use of this website. By using this information, You agree to indemnify and hold ATV Trails In Utah harmless for all claims, injuries, damages, or costs (including attorneys’ fees) that arise from your use of this website, including for injuries and damages to anyone in your party.
While ATV Trails In Utah strives to keep the information on its website current, any information on this website is provided by ATV Trails In Utah as a courtesy only, and ATV Trails In Utah makes no representations or warranties of any kind, expressed or implied, about the accuracy, availability, or completeness of information with respect to the website. Any reliance you place on this information is strictly at your own risk (and all members of your party). You are responsible for obtaining, reviewing, and interpreting the maps and information at your own discretion. You must use the maps based on information available at the time of the ride and not use this information as any authorization or permission in any respect. Information and policies on the ground and/or on the trail always overrule information on this website, in writing, or on a map. You agree to not hold ATV Trails In Utah liability with respect to the accuracy or changing conditions.